 Callmora
Getting started
This page gets you from a fresh download to a recorded, transcribed call: what Callmora needs, what first-run setup asks you, where the app lives day to day, and how it updates itself.
System requirements
Callmora is a native Mac app: macOS 26 on Apple Silicon. There's no account to create and no Callmora server anywhere in the picture — the app talks to your Mac, and optionally to the cloud services you choose to connect (AssemblyAI for transcription, an AI provider for summaries). Every feature is unlocked for a 14-day trial with no card required; after that it's a one-time $99, not a subscription. See Licensing & trial for details.
Download and install
- Download the DMG from updates.callmora.app/Callmora-latest.dmg (the same file behind every "Download" button on this site).
- Open the DMG and drag Callmora into Applications.
- Open Callmora. First-run setup starts automatically.
First-run setup
A short wizard walks you through five screens: a welcome, permissions, your transcription mode, an optional encryption step, and a final "ready" screen. You can step back at any point, and Skip jumps straight to using the app — every step here can also be revisited later in Settings.
Permissions
Callmora asks to grant, one at a time: Microphone, System audio, Notifications, and an optional Calendar permission for Calendar Join & Record. Microphone and System audio are what recording needs. Click "Grant" for each; if you deny the system prompt instead, that row's button turns into "Open Settings" so you can pick it up later in System Settings → Privacy & Security.
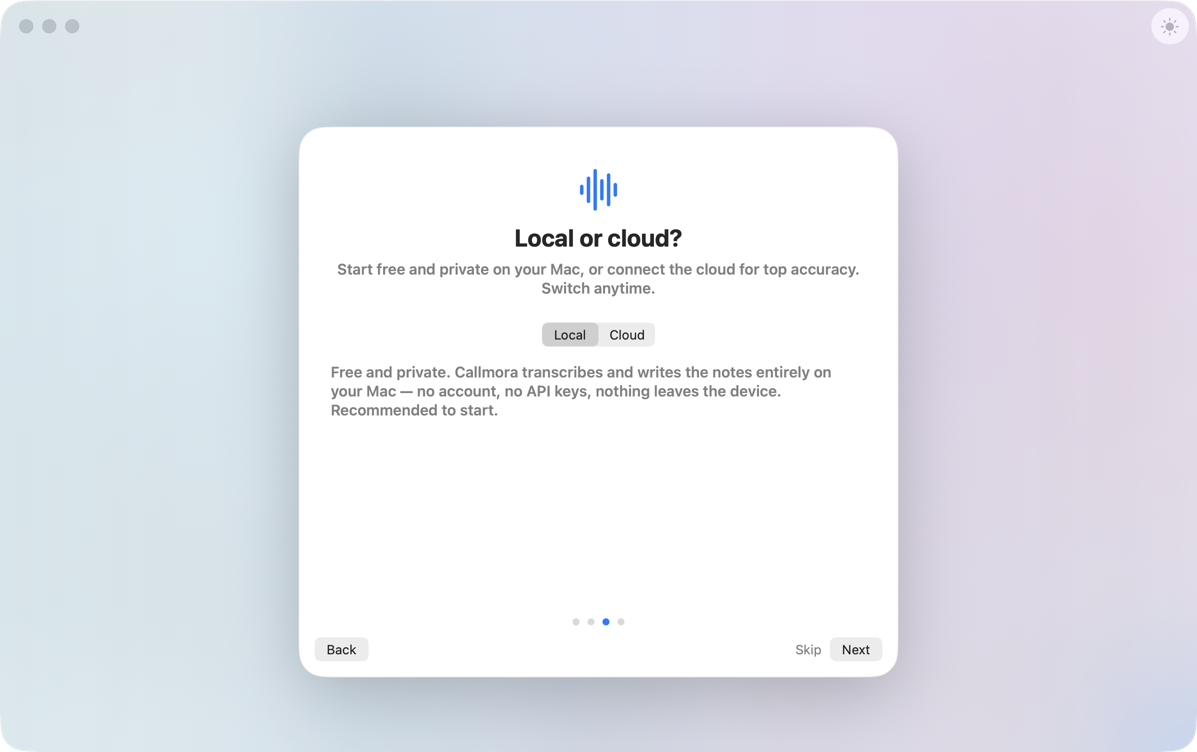
Local or cloud?
Next, a segmented switch marked Local and Cloud picks how calls get transcribed. Local runs entirely on your Mac: no account, no API key, nothing sent out to be transcribed — notes still need an AI summary model, added whenever you want them. Cloud uses AssemblyAI for the sharpest transcript on hard audio, plus a summary provider of your choice (OpenAI, Gemini, Claude, or the AssemblyAI LLM Gateway); keys are stored only in your Mac's Keychain. Switch modes anytime in Settings. See Transcription and AI notes & chat.
Keep your calls private (optional)
The next screen offers at-rest encryption — transcripts, notes, and recordings sealed behind a password, unlockable with Touch ID. It's off by default: Set Up Now configures it on the spot, Not Now skips it (turn it on later from Settings → General). Details, including the recovery key and lock timeouts, are in Security & sync.
You're all set
The last screen shows your recording and dictation shortcuts (click either to change it) and iCloud sync — a master toggle for transcripts, notes, and call history, plus a separate "Also sync audio recordings" toggle. Both need iCloud sign-in and are off by default; remembered voices don't sync unless you turn that on separately. See Security & sync and Speakers & voices.
Where Callmora lives
Callmora runs as a menu-bar app with a regular window alongside it. The menu-bar icon shows a waveform, with a red dot while a call is recording. Click it to open the panel — capture pickers, the Record call button, and your recent calls, with a Show Callmora row that opens the main window and a quiet Settings (⌘,) / Quit (⌘Q) strip underneath. The main window is where you browse your call library, read notes, and chat about a call.
Your first recording
- Click the menu-bar icon and press Record call — or use your recording shortcut from anywhere.
- Talk normally. The panel and main window both stay usable while a call is recording; nothing locks you out.
- Press Stop (menu-bar panel) or the same shortcut to end the call.
- Callmora transcribes the audio and, if you've configured a summary model, writes the notes. Open the call from the menu-bar panel or the main window to read it.
Already have a recording instead of a live call? The Import button next to Record call takes an existing audio or video file and runs it through the same pipeline — see Import & export. For everything about starting, stopping, and automatic recording, see Recording calls.
Your library on your iPhone
Once the Mac is set up, install Callmora on the iPhone and sign it into the same iCloud account: your calls, notes and transcripts arrive on their own, and you can record away from your desk while the Mac does the transcribing. See Callmora on iPhone.
Keeping Callmora up to date
Callmora updates itself. With Check for updates automatically turned on (the default) in Settings → Updates, it checks on its own schedule and offers to install what it finds. You can trigger a check anytime with the Check Now button on that same tab, or with Check for Updates… in the app menu. The tab also shows your current app version.
Next: Recording calls — starting and stopping, automatic detection, and Calendar Join & Record.